
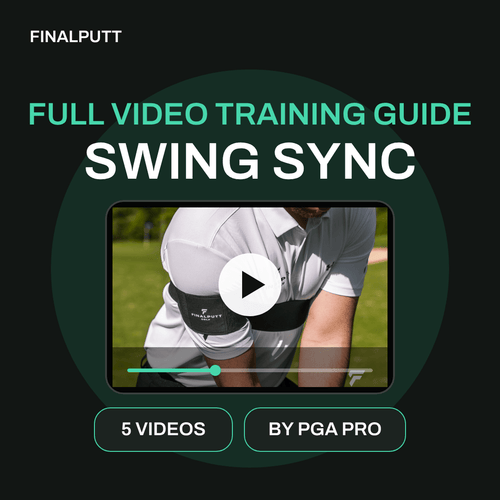



Full Instruction Video:
Subscribe to our channel so you don’t miss out on new content, instructions, and tips.
Disclaimer: The instructions in this video are intended as a general guideline. The use of FinalPutt products is at your own risk. FinalPutt is not liable for any injury, damage, or other consequences resulting from improper, unsafe, or unintended use of the product.
Want the Full Video Training Guide?
👉 Get The Program Here
How to Use the Rotation Trainer to Fix Your Shoulder Turn and Build Better Golf Rotation: A Complete Guide
The Rotation Trainer is a visual feedback tool that makes your shoulder plane visible on every swing. It is a training rod that attaches across both upper arms and shows you exactly how your shoulders are rotating, tilting, and turning throughout your swing. If you are losing distance, coming over the top, hitting inconsistent shots, or struggling with poor sequencing, your shoulder rotation is almost certainly off. The problem is that you cannot see your own shoulder plane while you swing. The Rotation Trainer changes that.
Most golf training aids force your body into a position. The Rotation Trainer does something different. It shows you what your body is doing so you can fix it yourself. You see your tilt and turn in real time. You see whether your shoulders are rotating on the correct plane or spinning flat. You see whether your rotation is consistent from swing to swing. Once you can see it, you can fix it. That is the entire principle behind this tool: you cannot fix what you cannot see.
With just a few minutes of practice a day, you will develop a more consistent, powerful, and on-plane shoulder turn that translates directly to better ball striking and more distance. This guide will walk you through everything, how the product works, how to set it up, how to train with it, what mistakes to avoid, and how to get the most out of every session.
What Is the Rotation Trainer and How Does It Improve Your Golf Swing?
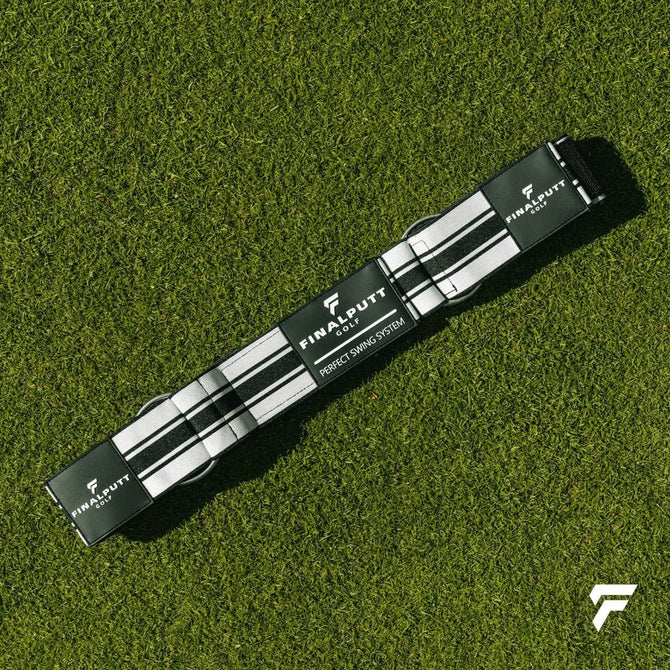
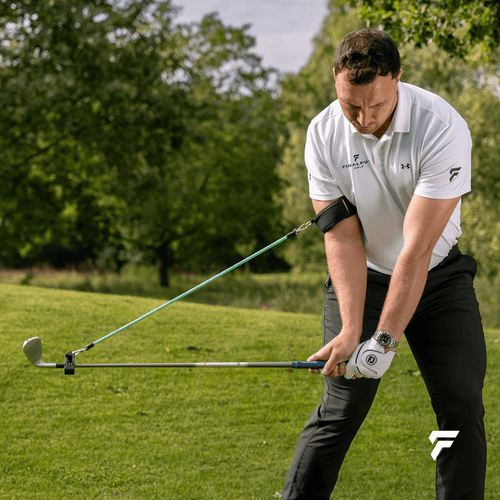
The Rotation Trainer is a lightweight training rod that attaches across both of your upper arms. When you take your stance and swing, the rod moves with your shoulders, giving you a clear visual reference of your shoulder plane throughout the entire motion.
Why Shoulder Rotation Matters Your shoulder turn is the engine of your golf swing. It controls your swing plane, your sequencing, your power, and your consistency. When your shoulders rotate correctly, on a tilted plane with proper sequencing from the ground up, the club naturally falls into the right position and speed builds efficiently. When your shoulders rotate incorrectly, spinning flat or turning too steeply, the club gets thrown off plane and everything breaks down.
The problem is that shoulder rotation is invisible to the golfer. You cannot see your own shoulders while you swing. You can film yourself and watch it back, but that is after the fact. You cannot correct something in real time if you cannot see it happening. This is why shoulder rotation faults are so persistent. Golfers know something is wrong but cannot identify what it is because the fault is behind them and above them.
How the Rotation Trainer Makes the Invisible Visible The rod extends across your upper arms and moves exactly as your shoulders move. When you look down at address, you can see whether your shoulders are aligned correctly. When you take the club back, you can see the angle of your shoulder turn. When you rotate through impact, you can see whether your shoulders are on plane or spinning out.
This real-time visual feedback lets you self-correct during practice without a coach, without video, and without guessing. You see the fault. You adjust. You see the correction. You repeat. That feedback loop is what builds a proper shoulder turn faster than any other method.
How to Set Up the Rotation Trainer
Setting up the Rotation Trainer correctly ensures you get accurate visual feedback on every swing.
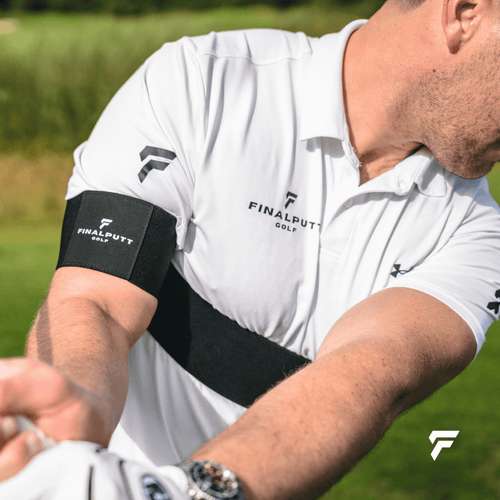
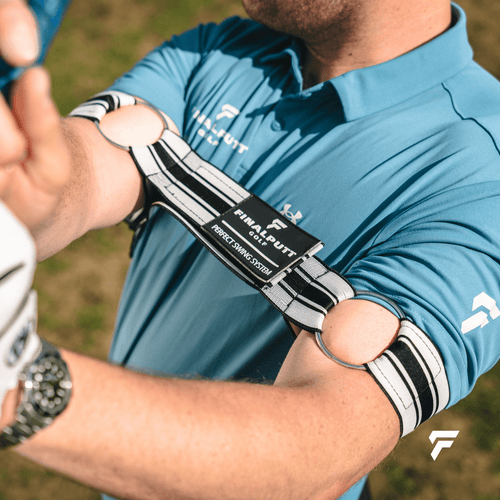
Step 1, Attach the Rod Across Both Upper Arms Position the Rotation Trainer so the rod sits across both upper arms, between your elbows and shoulders. The rod should be secure and stable so it moves with your shoulders and does not shift or slide during the swing.
Step 2, Check the Alignment at Address Stand in your normal address position and look down at the rod. It should show you your shoulder alignment relative to your target line. Most golfers are surprised to see that their shoulders are not as square as they think. This initial visual check is already valuable before you even swing.
Step 3, Take Slow Practice Swings Before hitting any balls, take a few slow practice swings and observe the rod. Watch how it tilts on the backswing. Watch how it moves through impact. Watch where it finishes. This is your baseline. Now you know what your current shoulder rotation looks like and you can start improving it.
Step 4, Address the Ball Normally Set up to the ball with your normal stance, grip, and posture. The Rotation Trainer does not require any changes to your setup. It simply shows you what your shoulders are doing throughout the swing so you can make corrections based on what you see.
Quick Setup Checklist:
- Rod positioned across both upper arms, between elbows and shoulders
- Rod secure and stable, moves with your shoulders
- Shoulder alignment checked at address before swinging
- Slow practice swings taken to establish your baseline
- Normal stance, grip, and posture at address
How to Train With the Rotation Trainer for Maximum Results
Phase 1: Beginner, Seeing Your Rotation for the First Time (Week 1-2)
The goal in the first phase is awareness. You need to see what your shoulder rotation actually looks like before you can fix it.
Start with slow-motion swings without a ball. Put the Rotation Trainer on and take the club back at half speed. Watch the rod. Is it tilting on a steep enough plane, or are your shoulders spinning flat? Most amateur golfers have a flat shoulder turn, which means the shoulders rotate on a horizontal plane instead of a tilted one. A flat turn pushes the club outside and causes the over-the-top move.
Learn what correct rotation looks like. On the backswing, the rod should tilt downward toward the ball, showing that your lead shoulder is working down and under, not around. On the downswing and through impact, the rod should show your shoulders rotating on plane with your trail shoulder working down and through. The correct feeling is that your shoulders are turning on a tilted axis, not spinning on a flat one.
Hit 15-20 slow half swings per session with a wedge. Keep the speed slow enough that you can observe the rod throughout the motion. The point is not to hit good shots yet. The point is to see your rotation clearly and start connecting what you see with what you feel.
Take it off and hit 10 balls without it. Try to recreate the visual in your mind. Can you feel the correct tilt without seeing it? This is where internal awareness starts building.
Phase 2: Intermediate, Correcting and Grooving the Right Turn (Week 3-4)
Now that you know what your rotation looks like, you start correcting it and building consistency.
Move to three-quarter swings with mid-irons. Increase the speed slightly. The Rotation Trainer will show you whether your shoulder plane holds up as the swing gets faster. Many golfers rotate correctly at slow speed but revert to a flat spin when they add speed. The rod will show you immediately if this happens.
Focus on the transition. The transition from backswing to downswing is where most rotation faults occur. Watch the rod at the top. Does it stay on a tilted plane, or does it flatten as you start down? If it flattens, your shoulders are spinning out instead of rotating on plane. This is the key moment to correct.
Start noticing your ball flight. With an on-plane shoulder turn, you should see straighter shots, more consistent trajectory, and better contact. The ball should feel easier to hit because the club is arriving on a better path.
Increase to 30-40 balls per session. Alternate between Rotation Trainer on and off every 10 balls. The on/off cycle trains your body to maintain the correct rotation without relying on the visual feedback forever.
Add driver practice. The driver amplifies rotation faults more than any other club. A flat shoulder turn with a driver creates massive slices and pulls. Put the Rotation Trainer on and see exactly what your shoulders are doing at full speed with the longest club in the bag. This is where the visual feedback is most valuable.
Phase 3: Advanced, Locking In Consistent Rotation (Week 5+)
By now, you should have a clear understanding of what correct rotation looks like and feels like. Your body is building the pattern.
Use the Rotation Trainer as a warm-up tool. Wear it for the first 10-15 swings of every practice session to confirm your shoulder plane is correct before you start hitting without it. Think of it as a calibration tool that sets your rotation for the session.
Use it for alignment checks at address. Even without hitting balls, the Rotation Trainer is valuable simply for checking your shoulder alignment at address. Many golfers develop alignment drift over time without realizing it. A quick check with the rod before your round confirms your shoulders are square.
Film yourself with the Rotation Trainer on. Recording your swing with the rod visible gives you a clear view of your shoulder plane from every angle. Compare your rotation from week one to week five. The improvement will be obvious.
Test yourself. Hit 20 balls without the Rotation Trainer. Film from behind. Is your shoulder turn consistent? Is the tilt correct? If yes, the visual feedback has done its job and your body has internalized the correct rotation. If you see the flat spin creeping back, put the rod on and recalibrate.
Common Mistakes to Avoid When Using the Rotation Trainer
Mistake 1: Swinging too fast to see the feedback The whole point of the Rotation Trainer is that you can see your shoulder plane. If you are swinging at full speed from the start, you cannot observe the rod. Start slow. Watch the rod move. See the plane. Then gradually increase speed as your body learns the pattern.
Mistake 2: Only watching the backswing Many golfers focus on their shoulder turn going back but ignore what happens through impact. The downswing and through-swing rotation is just as important. Watch the rod through the entire motion, not just the first half.
Mistake 3: Confusing flat with correct A common misconception is that a big shoulder turn means a good shoulder turn. Many golfers have a large but flat rotation, which actually makes their swing worse. The Rotation Trainer shows you the plane, not just the size. A smaller turn on the correct tilted plane is better than a huge flat spin.
Mistake 4: Not using it at address One of the most valuable uses of the Rotation Trainer is simply checking your shoulder alignment before you swing. If your shoulders are open or closed at address, every swing that follows starts from a flawed position. Always check the rod at address before you start your motion.
Mistake 5: Never taking it off The Rotation Trainer is a visual feedback tool, not a permanent attachment. You need to train without it to develop internal awareness of your shoulder plane. Alternate on and off during every session. The goal is to feel correct rotation without needing to see it.
Mistake 6: Expecting it to force the correction Unlike physical constraint tools that make incorrect movements impossible, the Rotation Trainer shows you the fault and lets you correct it yourself. It does not force your shoulders into the right position. It shows you where they are so you can learn to put them in the right position. That is what makes the correction permanent, because you are building the awareness and the skill, not relying on a device to do it for you.
What Golf Swing Faults Does the Rotation Trainer Fix?
Flat Shoulder Turn
The most common rotation fault in amateur golf. Your shoulders spin on a horizontal plane instead of tilting on an angled one. This pushes the club outside on the backswing and forces it over the top on the downswing. The Rotation Trainer shows you the exact angle of your shoulder turn so you can see the flat spin and correct it to a proper tilt.
Over-the-Top Swing Path
The over-the-top move is often blamed on the arms, but it frequently starts with the shoulders. When your shoulders spin flat at the start of the downswing, the club has no choice but to come over the top. The Rotation Trainer shows you the transition moment where the flat spin happens so you can correct it at the source.
Inconsistent Ball Striking
When your shoulder rotation changes from swing to swing, your club path changes, your contact point changes, and your ball flight becomes unpredictable. The Rotation Trainer gives you a consistent visual reference so you can groove the same shoulder turn on every swing.
Loss of Distance
A flat shoulder turn limits the amount of energy you can generate because it works against the natural tilted plane of the golf swing. When your shoulders rotate correctly on a tilted axis, the club drops into the slot naturally and speed builds efficiently. The Rotation Trainer shows you the correct tilt that unlocks distance you did not know you had.
Poor Sequencing
Correct golf sequencing means the lower body leads and the shoulders follow. When the shoulders fire too early or spin out of sequence, power is lost and the swing path is compromised. The Rotation Trainer lets you see your shoulder timing relative to the rest of your body, making it easier to train proper sequencing from the ground up.
Open or Closed Shoulders at Address
Many golfers do not realize their shoulders are misaligned at setup. Open shoulders at address aim the swing left. Closed shoulders aim it right. The Rotation Trainer gives you a clear, instant visual of your shoulder alignment before you even start your swing.
Where to Use the Rotation Trainer
At the Driving Range The best place to use the Rotation Trainer is at the range where you can hit balls and observe the feedback simultaneously. Start every session with the rod on to calibrate your rotation, then remove it and see if the correct turn holds.
In Your Backyard Slow-motion swings in the backyard with the Rotation Trainer are one of the most effective ways to build awareness. No ball required. Just swing and watch. See the tilt. Feel the turn. Repeat.
At Home in Front of a Mirror Combine the Rotation Trainer with a mirror for the ultimate feedback loop. You see the rod showing your shoulder plane AND you see your body position in the mirror. This double visual accelerates your understanding of how rotation connects to the rest of your swing.
Before a Round Use the Rotation Trainer during your pre-round warm-up to confirm your shoulder alignment and rotation are correct before you step on the first tee. A few slow swings with the rod on can set your rotation for the entire round.
During Lessons If you work with a coach, the Rotation Trainer gives both of you a visible reference point for shoulder rotation. Instead of the coach describing what your shoulders are doing, you can both see it in real time. This makes instruction faster and more effective.
Tips for Getting the Best Results From Your Rotation Trainer
- Start slow, then build speed. You need to see the feedback to benefit from it. Begin at half speed and increase gradually as the correct rotation becomes natural.
- Always check your alignment at address first. Before you swing, look at the rod. Are your shoulders square? This one check can prevent an entire session of practicing from a flawed setup.
- Focus on the transition. The moment between backswing and downswing is where most rotation faults occur. Pay extra attention to what the rod does at the top.
- Alternate on and off every 10 balls. This builds internal awareness so you can feel correct rotation without seeing it.
- Use it with a mirror at home. Slow-motion swings with the rod and a mirror give you the clearest picture of your shoulder plane. Even 5 minutes a day builds awareness fast.
- Film yourself. Record your swing with the Rotation Trainer on. Compare your shoulder plane from week to week. Visual progress keeps you motivated and confirms the improvement is real.
- Clean and store properly. Wipe the rod with a damp cloth after use. Store it in your golf bag or at home where it will not get bent or damaged.
Key Features of the Rotation Trainer
Makes Your Shoulder Plane Visible The rod moves with your shoulders and shows you the exact plane of your rotation in real time. No guessing. No video delay. You see it as it happens.
Visual Feedback, Not Physical Constraint The Rotation Trainer does not force your body into a position. It shows you what your body is doing so you can correct it yourself. This builds real skill and permanent awareness, not dependency on a device.
Shows Alignment at Address Before you even swing, the rod reveals whether your shoulders are square, open, or closed. This simple alignment check prevents swing faults before they start.
Trains the Correct Tilted Shoulder Turn Most amateurs spin flat. The Rotation Trainer shows you the difference between a flat spin and a proper tilted turn, so you can correct the most common rotation fault in golf.
Works for Every Golfer Juniors, seniors, beginners, advanced players. Right-handed and left-handed. Any golfer who wants to improve their shoulder rotation will benefit from seeing it clearly for the first time.
Lightweight and Portable Easy to carry in your golf bag. Setup takes seconds. Use it anywhere, from the range to the backyard to the mirror at home.
Frequently Asked Questions About the Rotation Trainer
How long until I see results? Most golfers see improvement in their shoulder rotation within the first few practice sessions. Because the Rotation Trainer provides instant visual feedback, you can identify and correct faults immediately. Building permanent awareness typically takes 2-4 weeks of regular use.
Does it force my shoulders into the correct position? No. The Rotation Trainer is a visual feedback tool. It shows you what your shoulders are doing so you can correct the position yourself. This is what makes the correction permanent, because you are building real awareness and skill rather than relying on a device to hold you in place.
Can I use it on the course? The Rotation Trainer is best used during practice sessions, warm-ups, and at the range. It is a training tool designed to build awareness that transfers to on-course performance. Most golfers use it before a round during warm-up to set their rotation for the day.
Does it work for left-handed golfers? Yes. The rod attaches across both upper arms and works identically for right-handed and left-handed golfers.
What clubs should I use it with? All of them. Start with wedges and short irons at slow speed, build up to mid-irons and long irons, then add driver. It works with every club in the bag.
How is this different from the Rotation Check? The Rotation Check is a different product in the FinalPutt range. The Rotation Trainer uses a rod across both upper arms to show your shoulder plane visually throughout the entire swing.
Can beginners use it? Absolutely. Beginners benefit the most because they are building rotation habits from scratch. Starting with visual feedback means they learn the correct shoulder turn from day one instead of developing a flat spin that needs fixing later.
How do I clean it? Wipe with a damp cloth after use and let it air dry. Store in your golf bag or in a safe place where the rod will not get bent.
Final Thoughts
The Rotation Trainer is the simplest way to see what your shoulder rotation actually looks like, and fix it. Most golfers have never seen their own shoulder plane. They feel like they are rotating correctly but have no way to verify it. The Rotation Trainer gives you that verification instantly, on every swing, in real time.
You cannot fix what you cannot see. That is not just a tagline. It is the fundamental reason why shoulder rotation faults persist for years. Golfers try to fix their rotation based on feel alone, but feel is unreliable. What feels like a big tilted turn often looks like a small flat spin. The Rotation Trainer closes that gap between feel and reality.
If you are tired of a flat shoulder turn, an over-the-top swing path, inconsistent contact, and losing distance for reasons you cannot identify, the Rotation Trainer will show you exactly what is going wrong and let you fix it yourself. No batteries. No screens. Just a rod, your shoulders, and the truth about your rotation.
With regular use, you will build a more consistent, powerful, and on-plane shoulder turn that transforms your ball striking and adds distance you did not know was there.
Ready to see your rotation for the first time? Add the Rotation Trainer to your bag and find out what your shoulders have been doing all along.